Client Installation
Client Pre-Requisites
- Ensure server is installed: Binfer Enterprise Sync must be installed on the
server before being installed on each client.
- Create Client PC Files on the server: For each client installing Binfer Enterprise Sync, a unique “PC File” must first be created on the server. This can be done in the “PRIVATE CLOUD” module of Binfer. For additional instructions on how to
create a PC File, reference the “Binfer Enterprise Sync Admin Guide”.
- Verify “Test URL”: In the “SETTINGS” tab of the “PRIVATE CLOUD” module, copy the “Test URL” and paste it into your internet browser on the client computer.
NOTE: You are good to proceed with client installation if you see text in the browser that says “Binfer is On” along with a time stamp. If you do not see this, your port is not be open on the firewall.
Your network administrator should be able to help resolve this. Contact Binfer Support if this issue persists.
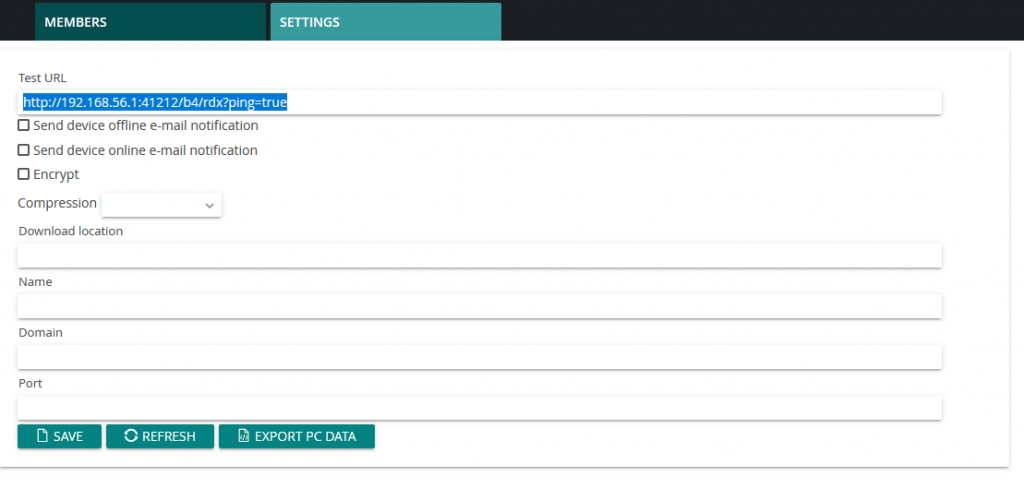
Note: Make sure that Server has a static external IP or mapped to a domain name (If mapped to domain name enter the domain name in Domain field click SAVE and then click EXPORT PC DATA). If your TEST URL has internal IP then paste your external IP or domain name in domain field and click save and then click export pc data.
Client Installation
- Ensure the pre-requisite steps have been completed.
- If any other Binfer software applications have been installed on the client in the past, ensure those applications have been completely closed out and uninstalled before proceeding.
- Right click on the “binfer-service.exe” installer and select “Run as Administrator”.This is the same exe file you used to install the server.
- Enter your admin credentials if prompted.
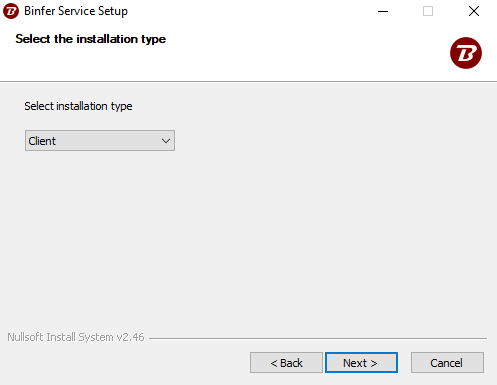
- In the drop down, select “Client” for the installation type and click “Next
6. Enter the setup details
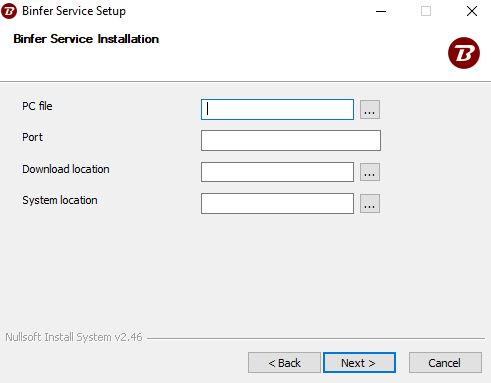
a. PC file
Ensure the PC file is stored in a path that is accessible by the admin.
Ensure that there are no spaces in the path.
b. Port
We recommend a different port than the port used for the server. (client example: 1214)
c. Download Location
Specify the default location where the files received by the server will be downloaded to.
NOTE: When entering the path, ensure there are no spaces. The path used should be accessible to the admin. We recommend using an empty folder.
d. System Location
Specify the location where the database and system files will be stored.
NOTE: When entering the path, ensure there are no spaces. The path used should be accessible to the admin. We recommend using an empty folder that is different than your download location.
7. Enter the location where Binfer Enterprise Sync should be installed.
8. Click the “Finish” button to complete installation process.
9. Verify installation
- On the server, open your “Services” app and verify that “BinferService” (aka Binfer Enterprise Sync) is installed, has a status of “Running”, and has an “Automatic” startup type.
![]()
10. Login to Admin console.
- Open the Binfer Web Admin by opening a browser and typing http://localhost:{Port}/admin.
- Enter the server logjn credentials
- Select “Login”