Opening a Port on Windows Defender Firewall
Note: This must be done on every client instance. For the server instance this must be done and the same process must be repeated for the same port’s inbound rule. This means that steps 1-3 are the same but in step 4 you select “New Rule…” for Inbound Rules instead of outbound rules. The rest of the steps are again the same. Things you will need: The port BinferService was installed on and an administrator password to the machine you are on- Click on the Windows icon within your taskbar or hit the windows key on your keyboard to bring up the windows menu. The windows icon can usually be found in the bottom left corner of a new instance of windows
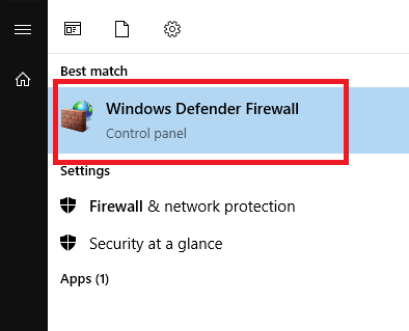
- Begin typing Windows Defender Firewall. Once the option shown below shows up please launch it
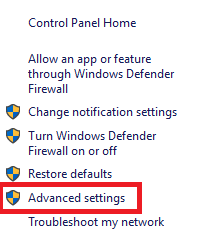
- The control panel will open with lots of different options. On the list of options on the left choose Advanced Settings. This option will require you to provide the admin password of whatever machine you are currently on if you are not currently an admin
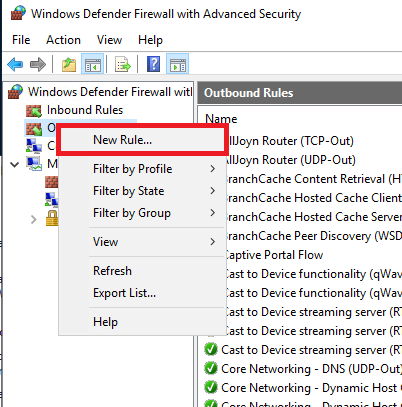
- The Windows Firewall application will open. Select outbound rules on the left side and then right click on outbound rules. From there select “New Rule…”
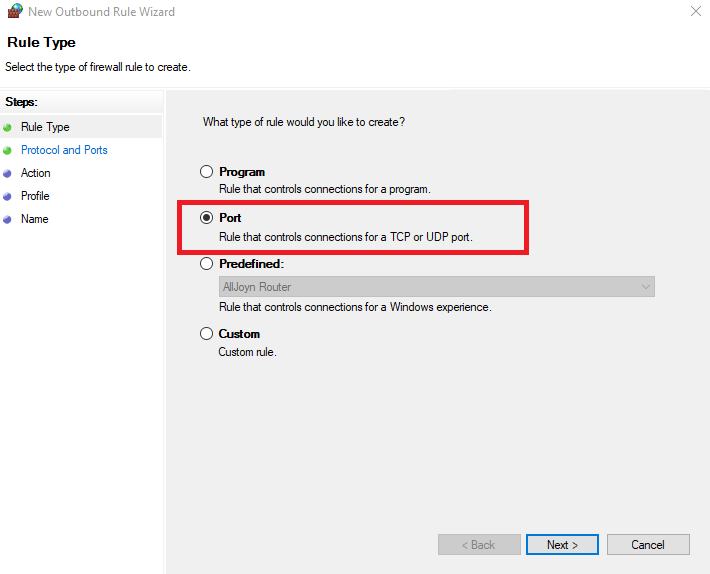
- In the window that opens select the Port option and click Next
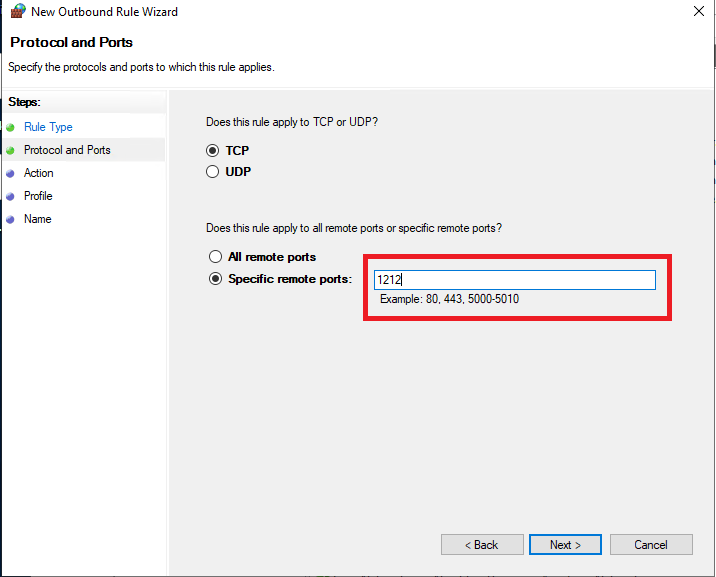
- In the window that comes up next TCP is the correct option so leave that selected. In the specific remote ports text box enter the port you installed BinferService on and then select Next. In the example below, BinferService was installed on port 1212
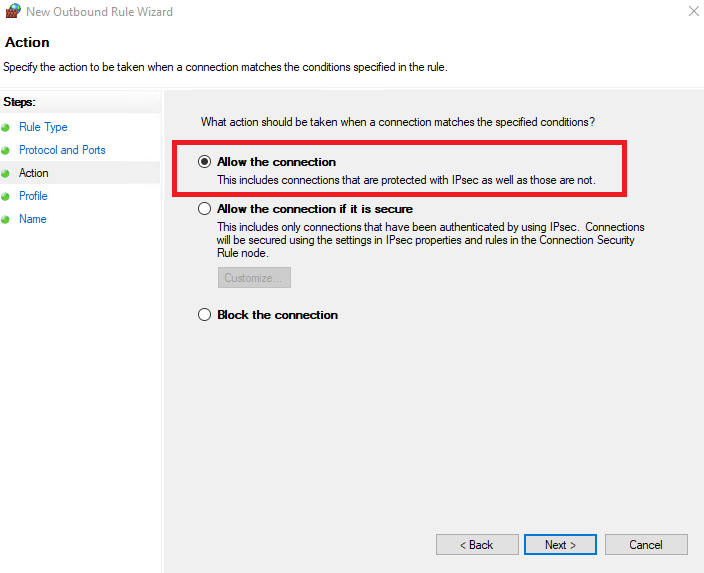
- On the next screen select Allow the connection and then press Next
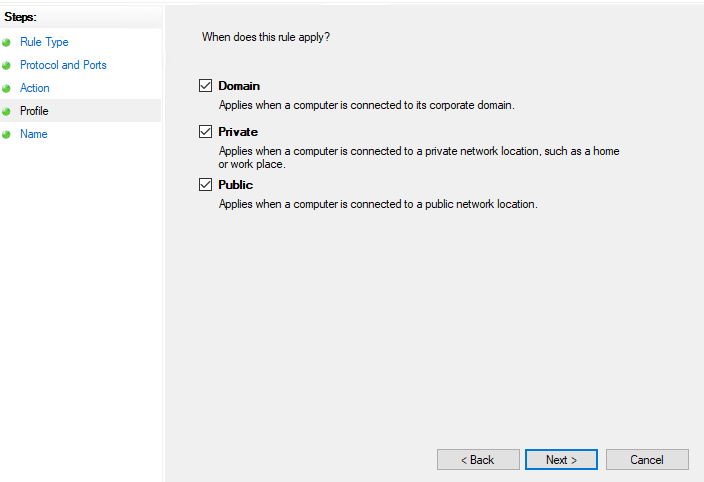
- On the next screen select when you would like this rule to apply. At a minimum private and domain must be selected. Once you have selected these options press Next.
- On the final screen give your new firewall rule a name and description if necessary and select Finish. Your local Windows firewall is now open for outbound connections on the port specified for BinferService.
